Aug 06, 2025
Timber Flooring Tips
Have you been thinking about the look, style and feel or polished timber flooring in your home?
Timber floors offer natural beauty, durability, and long-term strength underfoot. Yet installing timber flooring demands far more than simply laying boards in place.
You’ll need to understand the preparation, correct methods, and careful finishing touches for a result that stands the test of time.
In this guide, you’ll discover the essential steps for timber floor installation, plus critical factors to weigh before beginning, and expert insights for achieving a flawless finish.
We’ll cover preparation, product choice, premium-grade finishes and proven methods to avoid expensive mistakes. With tips on working with trades, you’ll have everything you need to achieve high-quality results.
It offers a natural, timeless surface that complements nearly any interior, from modern apartments to classic Federation houses.
Solid wood boards or engineered planks feature unique grains, subtle colour variations, and warmth that cannot be replicated by other floor coverings.
Homeowners gain the satisfaction of a surface that matures gracefully, developing deeper character as the years pass.
Beyond visual appeal, timber brings several practical advantages. It can be sanded and refinished multiple times, extending its usable life for decades if properly cared for.
Allergy-prone households often prefer timber’s easy-to-clean surface, which resists dust mites and other allergens commonly found in carpet. Additionally, timber supports higher property resale values thanks to its broad buyer appeal.
Durability stands among its strongest qualities. Good-quality hardwood withstands high foot traffic, pets, and the demands of daily family life with ease.
Look for products carrying certifications such as FSC (Forest Stewardship Council), which confirms timber originates from sustainably managed forests.
Selecting finishes with low VOC (volatile organic compound) content also supports healthier indoor air quality while lowering harmful emissions during application.
These flooring installations generally fall under minor works for most Perth homes, but exceptions exist. If structural changes become necessary, like replacing joists or subfloor systems, council permits might apply.
Homes in heritage-listed areas could also face extra conditions to preserve architectural character.
Every house holds unique features that influence a flooring project’s success. Floor structure, moisture levels, and even room layout can change the approach required for proper timber installation.
Homes with slab-on-ground builds might need moisture barriers to prevent dampness affecting timber boards. Upper-level timber joists may demand subfloor levelling or repairs before fresh planks can be laid.
Traffic flow deserves close consideration, too. Busy hallways, living zones, and kitchen areas require especially durable finishes to withstand constant wear.
For families with children or pets, scratch-resistant coatings and stronger hardwood species can offer extra peace of mind.
A solid toolkit makes light work of floor installation, saving frustration and time. Accurate measuring equipment ensures boards line up neatly from the very first row. A high-quality saw with sharp blades prevents splintering during cuts.
Nail guns, adhesive applicators, and clamps assist with secure fixing, while tapping blocks help close stubborn gaps without damaging tongues or grooves.
Choosing the right timber boards forms the backbone of any successful flooring installation. Solid hardwood, such as spotted gum or blackbutt, suits high-traffic zones thanks to impressive hardness and wear resistance.
Engineered boards, which feature a hardwood veneer bonded to a stable core, deliver excellent results where budget or moisture sensitivity matters.
Controlling moisture represents one of the most critical steps in protecting timber. Underlays with integrated vapour barriers, such as Dunlop’s Aquacoustic or Bostik’s Moisture Seal, guard against ground-level dampness rising through concrete slabs.
In elevated homes, breathable underlays help balance airflow beneath boards while cushioning impact noise.
Securing timber boards correctly depends on quality adhesives and fixings. Solvent-free, low-VOC glues preserve indoor air quality while providing a long-lasting bond.
In Perth’s climate, water-based polyurethane adhesives perform well, resisting movement from seasonal humidity changes.
A hardwearing finish protects fresh timber while highlighting its natural features. Water-based polyurethane, hard wax oils, or natural oils each bring advantages.
Water-based products dry quickly, suit busy households, and emit fewer odours. Natural oils enrich timber’s warmth and deepen the grain.
Start with a spotless, dry, and even surface. Remove debris, old adhesives, or nails that might compromise the new timber. Sweep thoroughly, then vacuum to eliminate fine particles.
Level any dips or high spots — timber laid over uneven ground can shift or squeak later.
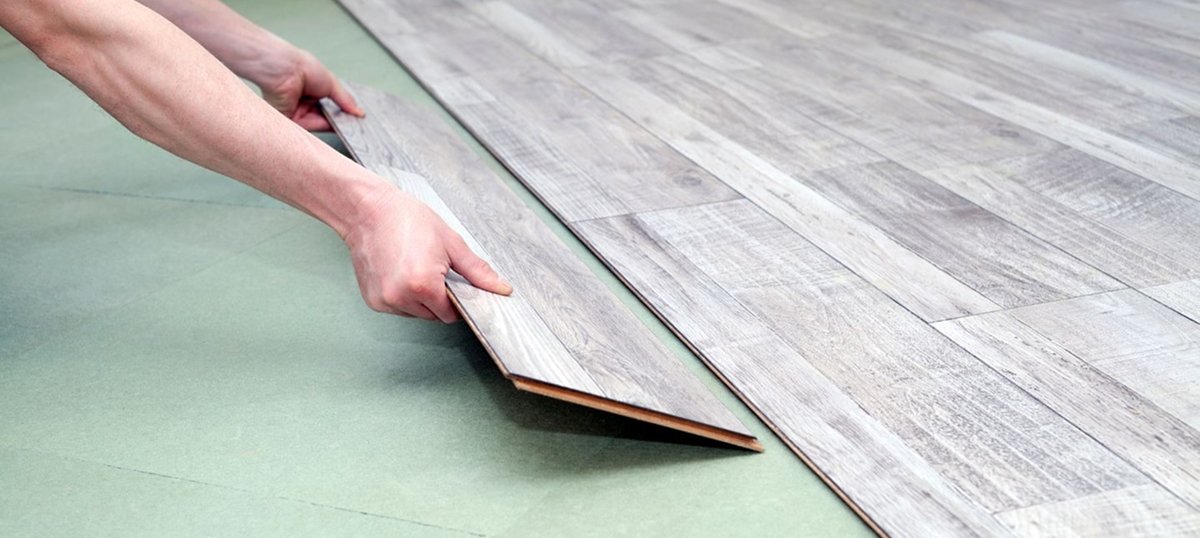
Lay down the chosen moisture barrier, overlapping edges as the manufacturer suggests. Tape joins tightly to stop moisture from seeping through.
Once secure, install acoustic or thermal underlay on top to cushion the boards and control noise transfer.
Never skip the underlay — Perth’s seasonal shifts in humidity can create big problems otherwise.
Let the boards sit in their intended room for several days. This stabilises the timber’s moisture content to local conditions, reducing expansion or shrinkage after installation. Stack packs neatly, allowing airflow between them.
Plan a layout before nailing or gluing down anything. Stagger joints across rows for visual appeal and stability. Begin along the longest, straightest wall, using spacers to leave an expansion gap for seasonal movement.
Either secret-nail, glue, or a combination of both methods, depending on product guidelines. Tap planks gently with a block to close gaps without damaging the tongues.
After all boards are down, sand the surface progressively from coarse to fine grit. Remove dust with a vacuum, then apply the chosen finish in thin, even coats. Respect drying times between coats for best durability.
Once cured, inspect every joint and edge. Replace any damaged boards immediately to avoid costly repairs later. Clean only with manufacturer-recommended products to protect the finish.
Plan routine recoating every few years to maintain a flawless surface.
| Item | Estimated Cost Range |
| Timber boards (supply) | $80–$150 per m² |
| Underlay & moisture barrier | $10–$25 per m² |
| Adhesives & fixings | $5–$15 per m² |
| Professional installation | $40–$70 per m² |
| Sanding & finishing | $30–$50 per m² |
| Disposal of old flooring | $300–$800 total |
| Council permits (if needed) | $150–$500 |
Allen Brothers Flooring proudly offers free onsite consultations, bringing decades of licensed, insured experience directly to your home.
Whether tackling a full renovation or simply exploring the possibilities, our friendly, skilled team will guide each step with confidence and care.
Reach out today for a free quote or tailored advice — discover how premium flooring can elevate your Perth property with craftsmanship trusted by thousands of happy clients.
Contact Allen Brothers Flooring today for expert advice, premium-grade materials, and a free, no-obligation quote.
Written by Chris Allen, co-founder, Allen Brothers Flooring